Showing posts with label Sidedish. Show all posts

Tuesday, 14 January 2014

Beetroot Masala


Beetroot Masala

Beets are weird.  I always think I hate them, until I have one in my mouth, then I’m surprised by how much I like it.  Even raw, they’re actually quite delicious. 

Around here, people do weird things to beets, especially with vinegar and cloves and cinnamon, not to mention tons of sugar.  Those beets I can live without.  This recipe is a more dignified approach to that.

1 teaspoon cumin seed
½ teaspoon black cumin seed
Beets have such terrifying after effects ...
1 teaspoon fennel
1 flake mace
10 black peppercorns
1 stick cinnamon (or ½ teaspoon ground cinnamon)
4 cloves
1 teaspoon coriander seed
½ teaspoon ground turmeric  

1 tablespoon canola oil
1 teaspoon ghee
1 small onion finely diced
3 finely diced Thai chilies (or to taste)
1 inch ginger, julienned
5 cloves garlic, chopped
3 beets, peeled and finely diced
1 cup cherry tomatoes, halved or quartered
1 teaspoon jaggery
salt to taste
1 cup water
1 cup plain yogurt

Dice everything finely.
Start by dry roasting the whole spices. Place them in the pan you will be using, and put them on medium high heat until they waft up a bit of smoke and get fragrant.  Shake the pan around a bit, or use a brush to move the spices around.  The process should take less than three minutes, depending on the heat of your pan.  Leave the cinnamon in the pan and brush the rest of the spices into a spice grinder, and add the ground spices.  Set aside.


Put the oil and ghee into the pan with the cinnamon stick, and turn on the heat to medium high.  Add the onion, chilies and ginger.  Brown the onion brown a little and reduce heat to medium.  Once the onions are soft and golden in spots, add the garlic and cook for a couple of minutes.  Grind the spices together, then add to the onion mixture.  Cook and stir for the next two minutes.  Add the diced beets, tomatoes,  jaggery and water.  (As my cherry tomatoes were previously oven roasted, and very caramelized, they were already sweet, so I didn’t use jaggery.)  Cook till the water is mostly gone, and the beets are fork tender.  This should take about thirty minutes. If you’re too lazy when dicing beets, and think you’ll save time by leaving them in larger cubes, you’ll pay by having to cook them longer.  Beets are tough little guys!

Beets look so pretty
So ridiculously pretty!
In the last five minutes of cooking, stir in the yogurt and let heat through.   I served this with sag paneer and reduced gluten chapattis made with whole wheat and chickpea flour.  If I’d been more on top of things, I would have added the beet leaves to the sag paneer, but alas, I kept the beets a few days too long, and the leaves sadly wilted. Perhaps you will be better organized.  


Beetroot makes a nice side dish, takes about forty-five minutes to prepare, and it looks so pretty.  My friend Jeanne puréd her beetroot masala, and added paneer.  She called it pink paneer.  Why not?

Beetroot Masala with Sag Paneer and Gluten reduced chapatis
A nice, light vegetarian supper...

Monday, 8 July 2013

Watermelon Cilantro Salad


This sweet and savoury salad refreshes the palate and cools the mouth.  It’s especially wonderful on a hot day, or when you’ve just had a mouthful of very spicy chilies.  Best of all, it’s so quick to prepare!

1 round of cold watermelon, cut in a ½ inch slice, then cut into cubes
2 tablespoons very finely diced chives, or scallions
10 fresh mint leaves
15 stalks cilantro
5 arugula leaves
2 chive flowers
a few grates of black pepper
½ lemon, juiced

Make sure the watermelon has been chilled first.  Cutting it into cubes is the most work here, and that takes all of about five minutes. 

Even if the greens don’t come from your garden, wash them and dry them well.  Press the mint leaves together gently, and roll.  Use scissors to cut them into thin strips.  Using scissors, also cut up the cilantro, including the clean ends of the stalks.  You can use the arugula stalks as well, if the plants are young, otherwise, just the leaves.  

The carefully washed chive flowers can be gently rubbed into a towel to dry them, then the petals can be pulled apart, thrown into the mix of all the above ingredients.  Toss, and cover with plastic wrap and refrigerate till served.

This makes a great side dish, the perfect accompaniment to our barbecued lamb, spicy barbecued potatoes, shredded radish salad, and a special channa, that’s still to come.  Stay tuned.

What do you like to eat on a too hot day?

The colours before our last storm glowed!  The flash doesn't quite capture it, but you kind of get the picture.  The red car down the street was positively vibrating.  These storms cool us down pretty fast!  Most luckily we didn't get the hail!

Thursday, 20 June 2013

Shredded Radish Salad


The radishes this year are especially delicious, even from the stores.  If you can get them with their greens, they’re even more flavourful.  I got this recipe idea from the cafeteria at downtown Calgary’s Community Natural Foods.  

When I tasted theirs, I was thrilled by their idea, but knew it could be a bit more lively.  This recipe is super quick to make, and delicious to serve.  This kind of salad makes a bright side dish, when you want a little something that’s cold, crunchy and tasty.

So easy!
15 fresh radishes
2 tablespoons minced red onion
1 teaspoon fennel seed
1 scant teaspoon sugar
8 fresh mint leaves
½ lemon, juiced
a few violas for garnish (optional) 

Wash and trim the tops and roots of the radishes.  Throw them in a blender and whiz for a few seconds, till they’re shredded.  (Mince your onion by hand though, as the blender will be mean to them, unlike your loving hands!)
Whizzing takes a few seconds


Pour shredded radishes into a small but pretty bowl.  Add minced onion, fennel seed and sugar.  Using scissors, cut mint leaves into thin strips over the radish mixture.  Squeeze lemon juice over the works and toss.


As this salad was a side dish for Allison’s birthday lunch, I thought I’d celebrate that by adding a viola for each lady present.  Violas have a nice spicy taste too, the perfect complement to radishes!  More recipes from the birthday lunch to follow…


How easy is that?

Saturday, 16 March 2013

Joanie’s Salad


Joanie’s Salad

An easy light salad often graces the table of an otherwise heavy Indian meal, and my friend Joanie had tasted one of mine, and later reported she couldn’t find the recipe here in this blog. 
So, Joanie, this one’s for you!  This salad takes mere minutes to prepare, and it’s fresh, light and healthy, and makes a great accompaniment to a meal.

You can adjust the proportions, depending on how much you are making.  I made this for three, but it would serve more or fewer, depending on your serving size. 

4 tiny Indian cucumbers, diced (or one cup of English cucumber, peeled and diced)
2 scallions, diced
½ tomato, diced
3 radishes, sliced and diced
6 mint leaves, piled onto one another and cut into thin ribbons
15 (approximately) fresh cilantro leaves
½ lemon or lime, juiced

Squeeze the lemon or lime half over the sliced vegetables, toss and serve.  The mint, lemon (or lime) and Indian cucumber make this salad taste especially fresh.  
I didn't include radishes in the salad Joanie tasted, but they were fresh and impossible to resist, so here they are.  I'd used a combination of British and Indian cucumbers, but discovered the Indian gems are so crisp and fresh, they can stand alone delightfully.

If you can’t find these cucumbers, just using the British cucumbers works fine.  This combination of light, tangy flavours cools the mouth when you’re eating spicy foods, so it’s especially appreciated by many! 


We ate this merely as an accompaniment, but you can eat as much as you like!

Sunday, 10 June 2012

Subji Side Dish –mixed vegetables


Subji Side Dish –mixed vegetables

When you’re serving a silly huge amount of lamb, you really need to balance it with something a little more healthy. 
I made this quick vegetable dish, and congratulated myself that it contained all sorts of nutritious gems:

1 tablelspoon mustard oil plus extra
½  teaspoon dark mustard seeds
½  teaspoon cumin seeds
1 inch ginger, julienned
1 red onion, diced
1 Jalapeno chilli, slivered
1 large garlic, sliced
1 ½ tablespoons boxed masala (I used a standard one, nothing fancy)
5 mini potatoes, halved
3 large broccoli stalks and florets, separated with tough ends removed, everything chopped
1 large sweet red pepper, diced
1 fresh tomato, diced
1 big handful methi leaves*, pulled from stems
1 big handful cilantro leaves and stalks
1 small lime, juiced

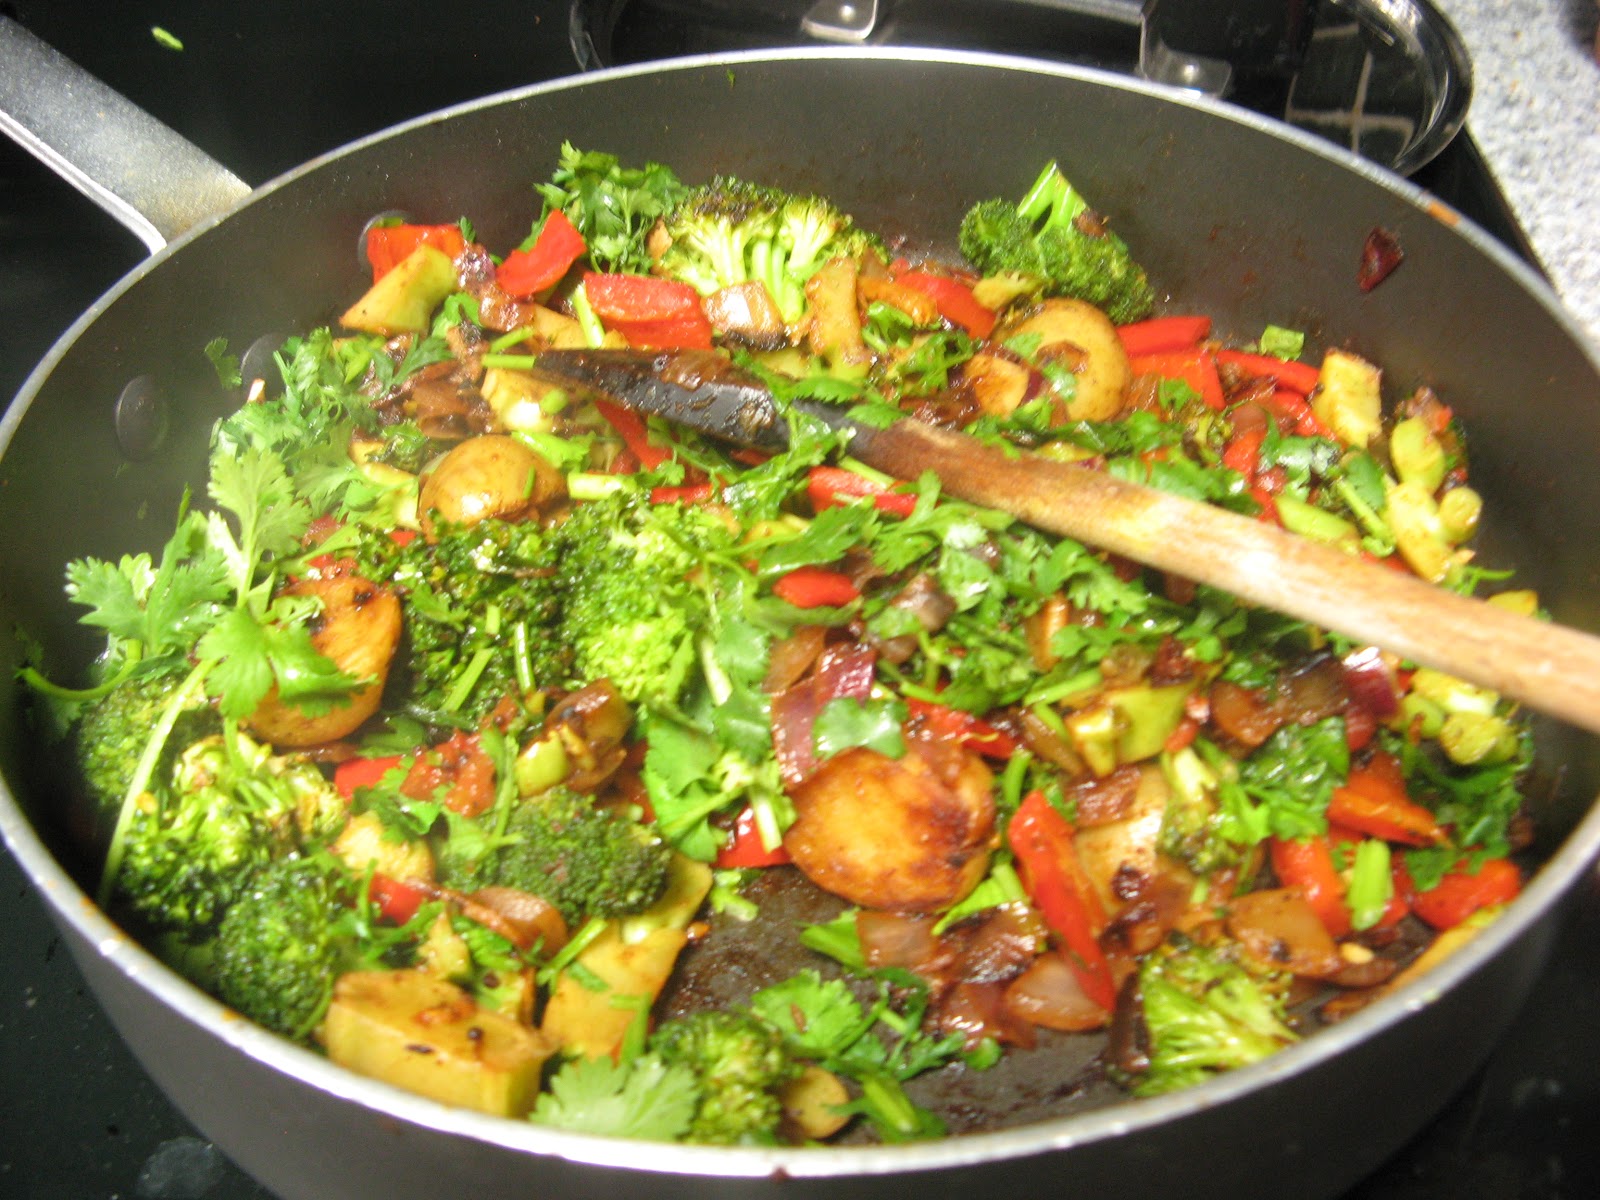
In a large, non-stick pan, heat the tablespoon of oil to medium high.  Toss in a few mustard seeds, and when they whiten and sizzle, add the rest.  Immediately add the cumin seed, then the onions, chilli and ginger.  Stir to cool the pan and turn heat to medium. 

Cook till onions are translucent with golden edges.  Add the garlic slices and cook another minute, then add the masala, and stir.  At this point, add the tiny potatoes, cut side down.  You may want to add a touch more oil around them, and slide them around a bit to take up that oil, because you want them to get golden and crispy.  Once they are golden and becoming tender, add the chopped broccoli stalks and cook till bright green.  Feel the potatoes, and if they are almost cooked, add the chopped florets along with the sweet red pepper and the fresh tomato. 

Cover and steam for about five minutes.  Add the methi leaves and let cook for another minute or two. Using scizzors, finely cut the cilantro over the ingredients.  Pour over the lime juice and stir to combine well, and remove from heat.  This makes a quick and easy sidedish that could easily become a main vegetarian course with a little paneer or a few raw cashews.  And it’s really healthy!

*Methi leaves are also known as fenugreek leaves.  I usually buy them in Indian grocery stores, but I found them at that famous Canadian really huge store, although a lady in a beautiful salwar told me they were a bit overpriced.
Methi leaves--I bought these but I've got them growing in my backyard.  Perhaps they'll need more heat.  It's been cool and rainy here for days on end, and the hot weather loving plants are grumbling and complaining. 

Saturday, 19 May 2012

Cilantro Strawberry Salad


Cilantro Strawberry Salad
I'm still basking in the remembered warmth of the other evening.  Today was icy cold again, although the sun was shining.  Plants are still sitting meekly in the greenhouse, but they may get to come out tomorrow.  We'll see.  Meanwhile, here's a summery cooling salad that charmingly accompanies a spicy main course, like the masala salmon we barbecued on a cedar plank on that glorious warm evening.  This salad is refreshing, quick and easy.

Core strawberries with a small knife.


15 large strawberries, husked, cored and diced into quarter inch cubes
2 tablespoons very finely diced red onion
15 stalks fresh cilantro
10 fresh mint leaves
fresh grated pepper
1 teaspoon almond oil

1 organic lemon, juiced

Combine the strawberries with onion. Using scissors, snip off the bottom ends of the cilantro stalks, then snip the remaining stalks and leaves into small pieces over the strawberries. Roll the mint leaves up (to get them into a bundle) then use scissors to snip them into very thin strips, over the strawberries.  Drizzle the oil over and then the lemon juice.  Grate the pepper over to taste, and toss and serve immediately.
To add a bit of knockout here, you could add some very finely chopped chilli, but that might be a cruel trick to play on someone who believes this salad will cool their smoking mouth.  But it would be awfully good, wouldn’t it?


Thursday, 17 May 2012

Barbecued Masala Corn on the Cob


Barbecued Masala Corn on the Cob

Now I'm nostalgically recalling the other evening when we basked in the warm sunshine and enjoyed the butterflies fluttering about the flowers.  This morning we're right back to snow, so all I can do is remember the sweetness from the other night.  That was when we made the delish fish, and this corn was one of the side dishes.  Barbecued fresh corn is always crazy easy.  I went light on the spices and garlic, because you- know- who had a singing performance, and he doesn’t like to knock his singing colleagues out with his breath.  If I could have, I would have upped the garlic and chillies by a lot!

2 tablespoons mustard oil
1 tablespoon ghee
1 teaspoon chunky chat masala (purchased in a box)
½ teaspoon powdered jaggery
1 teaspoon cayenne pepper
salt to taste
2 fresh garlic cloves, finely chopped
½ teaspoon garam masala

Peeled and wiped cobs of corn
lemon wedges

Mix the jaggery, garlic, salt, spices and oils, and microwave for about a minute, just to tame the garlic a bit, but you don't need to!  Peel the corn, and wipe it free of the cornsilk.  Using your hands, rub the oily masala mixture into the corn.  (Use leftover masala to baste other vegetables, such as potato slices or asparagus.)  Put corn cobs on the barbecue at medium high for about ten minutes, turning once.  When they’re golden and caramelized, and the kernels feel soft, take them off the heat and drizzle with a bit of lemon juice.  These were quite mild, as the masala doesn’t get a chance to really dig into the corn.  If you’re like me, and you want your ears blown off with every bite, double the spices and rub the mixture into the corn several hours before hand.  That should do the trick.  Otherwise, enjoy this mild and easy recipe for roasting masala corn.
Meanwhile, I have to race outside to take pots of shivering flowers back into my little greenhouse!
Poor babies.  After this weekend they should all be able to return outdoors and stay there!
There's chillies and fenugreek in here somewhere...

Friday, 20 April 2012

Saffron Basmati Rice


Saffron Basmati Rice
Saffron rice can be simple or fancy.  Most of the time, I prepare it simply:
1 to 2 teaspoons ghee  (clarified butter)
1 ½ cups basmati rice
3 cups cold water
½ teaspoon salt
pinch of saffron threads


I understand that some people insist on washing rice, but I don’t see the need.  I buy basmati rice in huge sacks, either from a certain big box store that everyone in Canada knows about, or from an Indian grocery store.  Sometimes it’s cheaper at the Indian grocery, but not always.  In recent years, I’ve never had an issue with stones or oddities in the rice, and I’ve heard that you mess with the necessary starches if the rice has been washed.  So I don’t.
I just turn the heat on at medium under a non-stick pot that has a tight lid, and let it heat up.  I add the ghee.  The amount depends on how much butter I’m allowing myself that day, then the rice.  I let the rice sizzle in the ghee for a minute or so, then I add the water, saffron and salt.  I crank the heat up to high, and stay there, so I don’t forget to turn it down to low the moment it starts to boil.  I put the lid on, wait 20 to 25 minutes, then gently fold the rice with a slotted spoon or giant fork to make sure the saffron is well distributed into the rice.

I used to buy saffron in clear plastic boxes in Indian groceries, but one day I ran out, and sent husband person off to the regular supermarket.  He bought the kind that’s enclosed in a wax paper bag that’s enclosed in a paper envelope inside a little glass jar.  I was disappointed until I opened the jar, and was awakened by its fabulous fragrance.  It was way more powerful than the type I’d been using.  It turns out that sometimes the supermarket is better than the Indian grocery!  The supermarket stuff is more expensive, but so worth it! 
This is how much saffron I use.  Pinch, schminch.
On fancy occasions, I use the above method, but I decorate the rice with crushed pistachios, fresh pomegranate seeds, edible silver leaf and shredded onion that has been fried in ghee till it’s crunchy.  When I go this far out, the rice goes on a big platter so that people really appreciate its beauty.  The last time I went this far was New Year’s Eve.  Unfortunately I didn’t take a picture, and it’s unlikely that an occasion so grand will come along soon, so there will be no picture of the fancy version for quite a while. 

Even if you’re not having a hugely fancy occasion, you can always sprinkle a few pomegranate seeds on the rice, if you have them, or do like my mother used to do, and toss in raisins.  Me, I can live without the raisins.  Let me know how you fancy up your rice!  Drop me a line, why don’tcha? BTW, a number of people have told me they've posted comments which haven't shown up.  You aren't finished posting a comment till the screen says something about 'redirecting'.  I do appreciate your comments a lot, so please wait for that message before closing the page.

Wednesday, 7 March 2012

Twisted Coleslaw


Why settle for the usual when you can have the delish?
Twisted Coleslaw 
Coleslaw gets a bad reputation from the truly nasty concoctions sold ready made in little plastic tubs.  The primary ingredients in those health killing slippery messes are white cabbage, artificial mayonnaise, and a ton of sugar.  Homemade coleslaw is usually better—shredded white cabbage, shredded carrot, a bit of finely diced onion, real mayonnaise and raisins.  Mine is based on the traditional homemade, but with a few healthful and delicious twists.
2 cups shredded red cabbage
1 diced dried apricot
2 diced dried plums
heaping tablespoon unsalted pistachios (shelled!)


1 teaspoon extra virgin cold pressed Greek olive oil
2 teaspoons left over cilantro mint chutney
For today’s lunch, I just put the red cabbage in a bowl, (why settle for bland, pale and not as nutritious?) and sprinkled the rest of the ingredients on top.  It was a great way to use up my left over fresh chutney, also full of fabulous health benefits!  Oh yum.  So delicious, and so much healthier than traditional coleslaw, and light years away from the stuff in the tub.  

I read somewhere that red cabbage may have the added benefit of suppressing the appetite.  So far that hasn’t happened, but I don’t crave sweets when my red cabbage delights me.  See my post about red cabbage and other fruitsand vegetables for a bit more info.

Monday, 27 February 2012

Raita (Flavoured savoury yogurt)


Raita and gobi parathas make a nice lunch!
Raita  (Flavoured savoury yogurt)
Luckily this is very easy and simple to prepare, full of calcium, protein and your best probiotic friends!

½ cup plain yogurt (I use homemade. Find the recipe here.)
1 tiny fresh garlic clove, smashed and chopped to a paste
4 stalks fresh cilantro
dusting of nigella seed, or perhaps paprika, or perhaps both
Raita is often used as an accompaniment to cool down an otherwise spicy hot dish.  The properties of the yogurt sooth a seared tongue.  For a big party, I’ll make several raitas to accompany the meal, each with different spices such as cumin, mint leaves, chilli flakes, or black pepper.  One time I made a raita with lots of fresh green chilli and cilantro, and my poor sister who needed a fast mouthful of raita to cool her mouth, grabbed the chilli raita by mistake.  She later claimed that she had to lay in my bathtub, with her mouth under the faucet.  A slight exaggeration, I’m sure. 

At least half an hour before serving, mix the yogurt, garlic paste and chopped cilantro.  Put in a pretty bowl, and sprinkle with nigella seed, and perhaps some paprika.  This makes a lovely accompaniment to any meal, but can also serve as the protein in a light lunch when served with chapattis or my recipe for gobi paratha.

Gobi Besan Paratha, or cauliflower stuffed flatbreads with chickpea flour

Today we had these with Sambar
 Gobi parathas  (cauliflower stuffed flatbreads with chickpea flour)

As far as I’m concerned, these paratha are a labour of love.  (When I say paratha, I mean chapattis, also known as roti, that have delicious bits in them.)
Paratha and chapattis are tricky at the best of times, but use some besan flour, and you up the challenge.  There’s a lot of grumbling about gluten these days, gluten is the stuff that makes the dough elastic, and the less there is, the stiffer the dough becomes.  White flour has lots of gluten.  Whole wheat less, and besan flour almost none, if any.  Because this dough has so little gluten, it can be a little brittle to work with, and it doesn’t rise beautifully.  However, the taste and health factors in these goodies make them well worth your time. 

The dough 1 cup besan flour (chickpea flour)
1 cup whole wheat flour plus extra
½ teaspoon coarse salt
½ teaspoon cumin seed (optional)
¾ cup boiling water
1 tablespoon melted ghee
Another tablespoon or so of melted ghee to be used later

Mix the flours, cumin and salt in a large bowl.  Carefully pour in a bit of the water and ghee, and stir with a fork, adding more water and ghee and stirring.  I use a fork to stir at this stage, as the dough is too hot to handle.  When you’ve stirred in all the water and ghee, let the dough rest for about twenty minutes.   The flour is very dry here, because our climate is arid.  Consequently, I need the time for the dough to soak up the moisture, and it needs to cool down.  When you’re ready, take off your jewelry and put your hand into the dough.  You want to work it, kneeding in a circular fashion, within the bowl.  It’s easier with just one hand.  If it’s quite sticky, add more whole wheat flour, or you could even cheat and use white at this point.  You want it to be a nice firm dough, not sticky, but nice and springy.
Cover and let rest again. 

Keep the bits as small as possible.
The filling1 tablespoon grapeseed oil
1 tablespoon ghee
1/3 red onion, finely diced
1 inch ginger, scraped and chopped fine
1 floret of cauliflower finely chopped
1 tablespoon garam masala or nice boxed masala
½ teaspoon tamarind paste
salt and chilli flakes to taste
10 stalks fresh cilantro

Heat the oil and ghee to medium heat, and gently fry the onions till they’re transparent.  Add the ginger and garlic, and fry for a few moments.  Add your ground spices.  Let fry for a few moments, then add the cauliflower and tamarind paste.  Cook for about five minutes.  Wash, dry and using scissors, cut the cilantro into the cauliflower.  Taste, remembering that the flavour will lessen when the filling is within the bread.  Adjust accordingly.
Spreading it out helps you visualize how many balls to make.
Now for the tricky part.   Starting with a spotless and dry countertop, dust a little wheat flour over your workspace.  I use a regular rolling pin, but a smaller Indian one is good too.  Lightly dust that as well.  Kneed the dough for a minute or so on the counter top.  Stretch it out in a long roll, and break off pieces that are somewhat larger than a golf ball.  At this point put the griddle onto medium heat.

Roll a piece of dough into a ball with both hands, using a quick motion.  It should be about an inch and a half across.  Push a hole into it with your thumb.  Fill the space with about a teaspoon of cauliflower filling.  Work the dough back into a ball, then place on your lightly floured counter.  Roll it out, aiming for a circle, with the dough as flat as you can get it, about an 1/8 of an inch thick, if possible.   Bits of vegetable will break through occasionally, but sigh and ignore it.  Lift the paratha with a scraper and your hand, and place on the griddle.  It’s easiest if two people are working together, one to fill and roll out the dough and one to watch the griddle and apply the ghee.  As soon as the dough starts to change colour a bit, flip it over and cook on the other side.  A few minutes does the trick.  At this point, spread a bit of ghee on the paratha and then the griddle and flip the paratha a third time.  Using a clean cloth or bit of paper towel, very gently press on the paratha, especially where you see it bubble.
This is truly the tricky part!  My Punjabi friend mastered the trick only by cooking chapattis for her dog for years on end.  (Her mother wouldn’t allow her to serve them to people till she’d perfected her method.)  If your method is perfect, the chapatti will puff up angelically. If not, don’t sweat it.

This is great for spreading ghee!
All in all, each paratha should only be cooked for a total of about five to seven minutes.  If they are burning before they’ve cooked, turn the heat down a little.  As each one is cooked, lift off and place in a deep enough dish to accommodate them all.  Some people brush a little more melted ghee on them as they are stacked.  This will always improve the taste, but maybe not your cholesterol level. 

You can keep them in a warming oven till they’re all done, or serve them as they’re cooked.  Today I served them with Sambar, but could just as easily served them with a bit of raita.   This recipe makes a wonderful weekend lunch, either way! 

Tuesday, 14 February 2012

Bright and Lively Cilantro and Mint Chutney


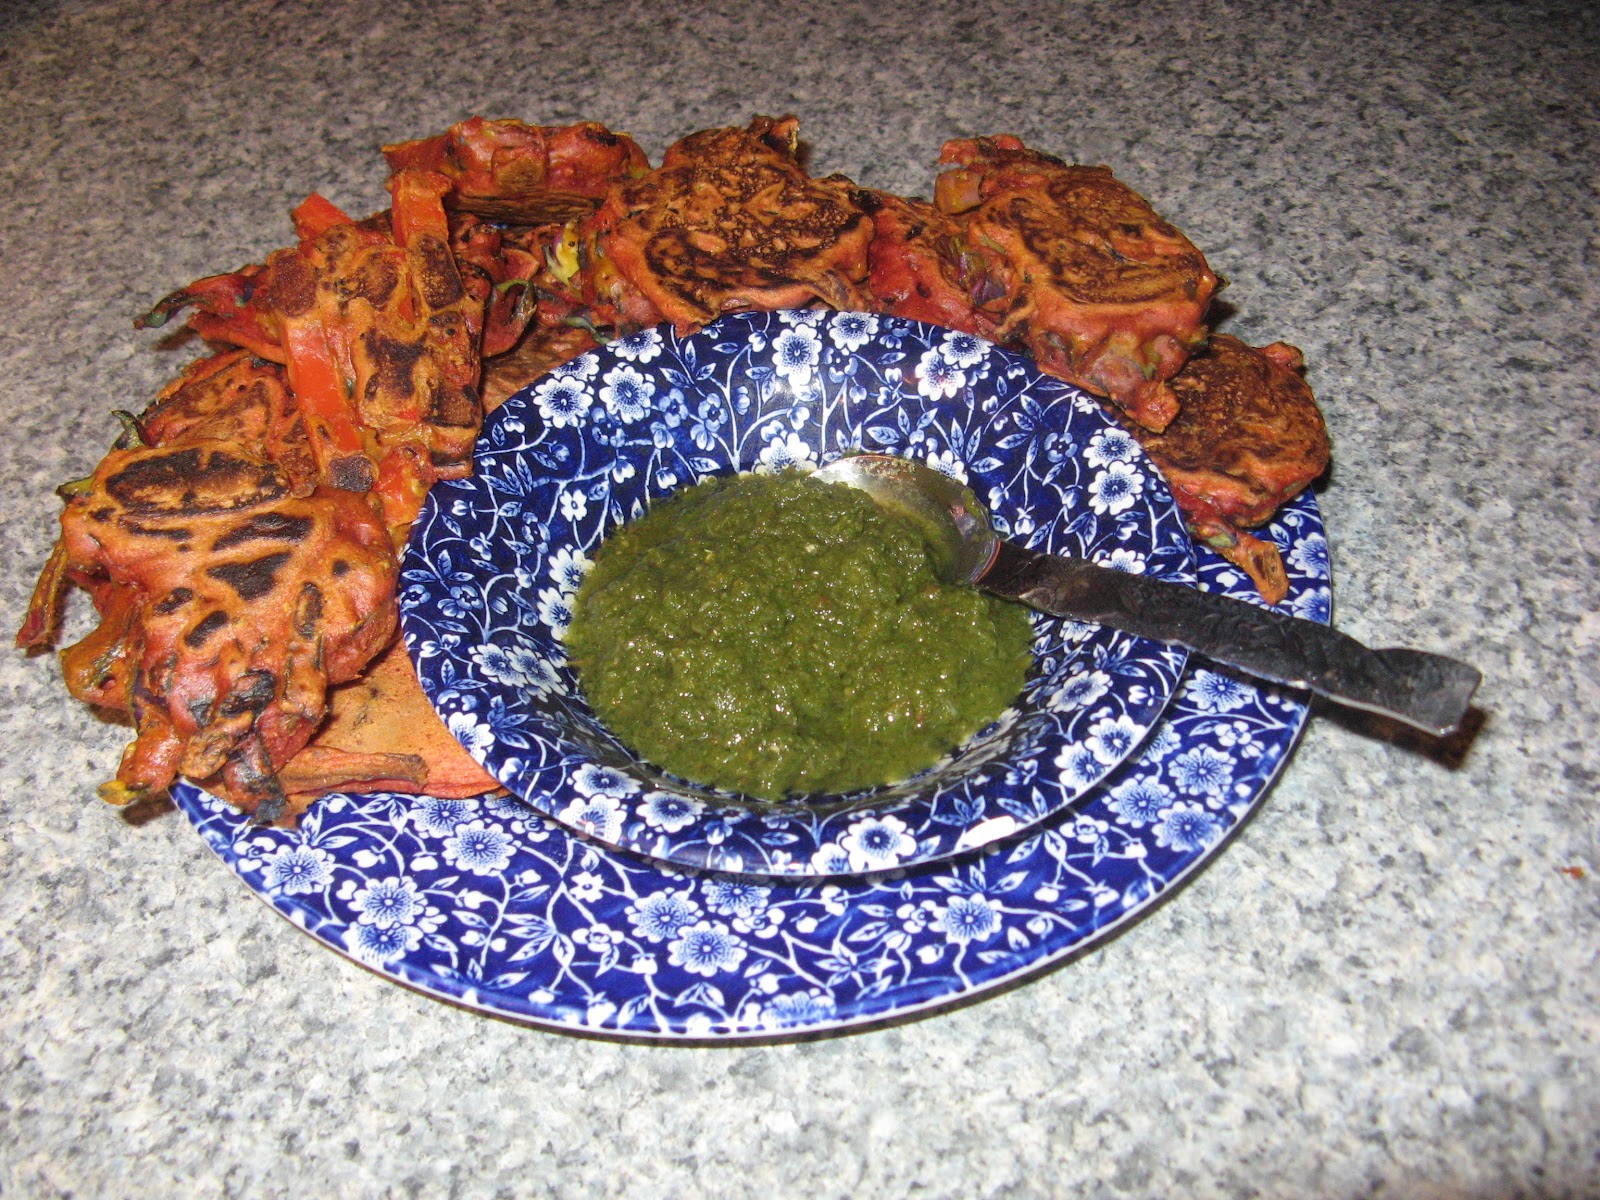
Cilantro and mint chutney with pakoras
Bright and lively Cilantro and mint chutney
This fresh chutney recipe is so healthy and it’s easy to make with a blender!

1 large tomato, roughly chopped
1 lime, seeded and juiced
2 cups fresh, washed cilantro leaves and stems
½ cup fresh washed mint leaves
4 green chillies
1 small fresh garlic clove
½ inch fresh ginger, roughly chopped
salt to taste

Add lime juice and tomato to blender and buzz till blended.  Add the chillies, garlic and ginger and buzz till well blended.  Add the mint and half the cilantro and buzz.  Add the rest of the cilantro and buzz. The last bit doesn’t have to be perfectly blended in.  A little texture is nice.  Pour into a pretty bowl with serving spoons.  This recipe for a bright and lively chutney will make an excellent accompaniment for pakoras.

Sunday, 29 January 2012

Angelic Cream Cheese Spread

Angelic Cream Cheese Spread is fabulous on cardamom bliss muffins or crackers!

Angelic Cream Cheese Spread

For in case you want to add more protein to your cardamom bliss muffin, here’s a recipe for a fabulous and easy cream cheese spread:

1 or 2 green cardamom pods, husked and ground fine in a mortar and pestle
4 dates, pitted and chopped as fine as possible (don’t worry if they keep clumping)
¾ cup spreadable cream cheese
1 teaspoon chocolate shavings 

Use a bowl that gives you plenty of room to mash and stir all of the above ingredients.  I use a fork for the task.  Put into a prettier bowl if you’re fussy, and serve with cardamom bliss muffins or crackers.  So delicious!  These are angelically  good.